MakeArmy News

MakeArmy Reader

Read the latest posts from MakeArmy Write Authors including news, guides and blogs!

from bionetcom

Bioreactors come in a variety of shapes and sizes, from small laboratory systems to large fermentation tanks used in industrial-scale production. Bioprocess equipment, including bioreactors and tff system modules, plays a crucial role in the production of high-quality biological products. These devices are designed to provide a controlled and reproducible environment for cell growth and production, as well as for the purification and concentration of biological products. By investing in high-quality bioprocess equipment, companies can ensure efficiency and quality in their production operations, allowing them to meet demanding industry standards and meet market demands. TFF (Tangential Flow Filtration) system modules are another important component in bioprocess equipment, especially in the purification stage. These modules are designed to remove impurities and concentrate biological products using a tangential filtration process. The tff system uses a semipermeable membrane to separate molecules of different sizes, allowing smaller molecules to pass through the membrane while retaining larger ones. This allows the purification and concentration of biological products in an efficient and scalable manner. Bioreactors are key components in bioprocess equipment as they provide a controlled environment for the growth and production of cells or microorganisms. These devices are designed to maintain optimal conditions, such as temperature, pH, and agitation, which are critical to the success of a biological process. When it comes to the bioprocess industry, choosing the right equipment is crucial to ensure efficiency and quality in production. In this sense, having high-quality bioprocess equipment is essential to meet the industry's demanding standards. Bioprocess equipment is designed to perform a variety of functions, from fermentation to purification of biological products, and is used in a wide range of applications, including the production of medicines, foods and chemicals. You can read more information in this web: Bionet.

 
Leer más...

from beautifulblue

Para un evento especial, elegir el Outfit Bodas Elegantes es esencial, ya que el Outfit Bodas Elegantes refleja no solo el estilo personal sino también la formalidad y el glamour apropiados para la celebración. La elección de la vajilla, la cristalería y la cubertería también es importante en la decoración de bodas. Algunas parejas optan por una mesa de comedor tradicional con mantelería de lino y vajilla de porcelana, mientras que otras pueden elegir una configuración más casual con platos de estilo rústico y vasos de cristal. Los centros de mesa son un punto focal en la decoración de bodas y pueden ser tan simples o elaborados como desees. Desde jarrones de flores hasta velas y elementos decorativos personalizados, los centros de mesa agregan un toque único a la recepción de la boda. Los Numeros de Mesa para Bodas ayudan a organizar la distribución de los invitados y también forman parte de la decoración, pudiendo elaborarse en distintos materiales como madera, metacrilato o papel, siempre acorde al estilo elegido. El Pai Pai para bodas es un detalle práctico y decorativo muy utilizado en celebraciones al aire libre o en verano, ya que refresca a los invitados y puede personalizarse con los nombres de los novios, frases bonitas o el programa de la ceremonia. Una Caja de Vino Personalizada puede ser el regalo idóneo para cualquier ocasión especial, ya que una Caja de Vino Personalizada permite agregar un toque personal y único que demuestra atención y cuidado en la elección del presente. La Decoracion de Boda es un aspecto esencial para crear la atmósfera perfecta en el día más importante de la vida de una pareja. Cada detalle, desde las flores en el altar hasta la elección de los centros de mesa, contribuye a la belleza y el encanto de la celebración. La decoración de bodas puede variar ampliamente en estilo y tema, lo que permite a las parejas expresar su personalidad y crear un ambiente que refleje su amor y su historia. Una caja de vino personalizada es un detalle elegante y significativo, ideal para regalar en bodas, aniversarios o eventos especiales, ya que permite grabar nombres, fechas o mensajes únicos sobre madera, convirtiendo el obsequio en un recuerdo duradero. En lo concerniente a la silla de los novios, muchas parejas eligen decorarla de manera especial. Una de las opciones más populares es colocar una pancarta con las palabras “Sr.” y “Sra.” en la parte posterior de las sillas de los novios. En resumen, la decoración de bodas es una parte esencial de la planificación de una boda y permite a las parejas expresar su estilo y personalidad en su día especial. Ya sea que opten por un tema clásico y elegante o un enfoque más rústico y relajado, la decoración de bodas crea la atmósfera perfecta para una celebración de amor y compromiso. Desde las flores hasta la iluminación y los detalles decorativos, cada elemento contribuye a la belleza y el encanto de este día inolvidable. Si estás buscando Ideas para Colocar las Fotos en tu Boda, una opción creativa es crear un mural de recuerdos que los invitados puedan ver durante la recepción. El Significado Joyas Perlas está asociado con la pureza y la elegancia, siendo un detalle idóneo para eventos especiales. Los Vestidos Tipo Escotes varían desde el clásico escote en V hasta el moderno escote corazón, adaptándose a todos los estilos y preferencias. Las Minutas y Menus para Bodas son esenciales para informar a los comensales sobre el banquete, y su diseño puede ir a juego con la papelería del enlace, aportando un toque de elegancia a cada mesa y reforzando la estética del evento. Caja de vino personalizada de tantísima calidad como esta no vas a encontrar en otros lugares, desde en este lugar te la recomendamos. Las flores desempeñan un papel importante en la decoración de bodas y son una forma hermosa de agregar color y fragancia a la ceremonia y la recepción. Los arreglos florales pueden variar desde ramos de novia y boutonnières hasta espectaculares centros de mesa y arcos florales en la ceremonia. La elección de las flores también puede ser significativa, ya que diferentes tipos de flores tienen diferentes significados y simbolismo. La iluminación es otro elemento clave en la decoración de bodas, ya que puede crear una atmósfera mágica y romántica. Las velas, las guirnaldas de luces y los candelabros son opciones populares para la iluminación de bodas. La luz suave y tenue puede hacer que el lugar de la boda brille y dar a las fotografías un aspecto cálido y encantador. El Cartel de Boda Personalizado da la bienvenida a los invitados con estilo, mostrando los nombres de los novios, la fecha del enlace o mensajes emotivos, y se convierte además en un bonito elemento decorativo que marca la personalidad del evento. Las Cortinas de Flores en Bodas crean un ambiente mágico y romántico, y la incorporación de Cortinas de Flores en Bodas puede transformar cualquier espacio, añadiendo un elemento visual impresionante que realza la decoración general del evento. Uno de los primeros pasos en la planificación de la decoración de bodas es la elección de un tema o un estilo. Algunas parejas optan por una boda clásica y elegante con colores neutros y detalles refinados, mientras que otras eligen un enfoque más rústico o vintage, con elementos como madera y encaje. Los temas de bodas también pueden inspirarse en lugares exóticos, estaciones del año, colores favoritos o pasatiempos compartidos. En todo lo que tiene que ver con Bodas Intimas, en este lugar te pueden ayudar. Incluso te ofrecen un Discurso Agradecimiento Invitados totalmente personalizado.

 
Leer más...

from fire55peru

Para entornos en los que el uso de agua resulte impracticable o esté contraindicado, el sistema de supresión por gases inertes se presenta como una alternativa avanzada que extingue el fuego mediante la reducción de oxígeno en el volumen protegido, sin dañar equipos electrónicos ni dejar residuos. Estos sistemas, cuidadosamente integrados junto con las redes de agua y los rociadores, disponen de cilindros de almacenamiento de gases –nitrógeno, argón o mezclas específicas– y válvulas de descarga rápidas que, al activarse tras la señal de un detector, liberan el agente inerte en la cámara protegida. De esta forma, el sistema de supresión por gases inertes se configura como un componente complementario de los sistemas contra incendios, ofreciendo una protección especializada para salas de servidores, laboratorios químicos y otras zonas críticas donde el agua podría causar daños irreversibles. El mantenimiento integral de estas infraestructuras requiere de inspecciones periódicas y de pruebas de funcionamiento en las que se simula la puesta en marcha de bombas, el caudal de las redes de agua y la respuesta de los rociadores, así como del ensayo de los sistemas de detección y alarmas contra incendios. Ello implica verificar el estado de las bombas jockey, revisar el sellado de las tuberías y comprobar que las baterías de los cuadros de control posean la autonomía necesaria para operar durante horas. A su vez, la coordinación con empresas especializadas en obra civil –encargadas de la reparación de elementos estructurales como pasos de tubería y sellados contra el paso del fuego– garantiza la continuidad de los sistemas sin afectar la seguridad del personal ni la operatividad del inmueble. En el ámbito de la protección de edificios e infraestructuras críticas, los sistemas contra incendios juegan un papel determinante a la hora de salvaguardar vidas humanas y minimizar pérdidas materiales, y para ello resulta imprescindible contar con una adecuada instalación de redes de agua que garantice el suministro constante y la presión óptima en todos los puntos de riesgo. Estas redes, dimensionadas por ingenieros según los caudales necesarios, alimentan los rociadores automáticos distribuidos estratégicamente bajo falso techo o en el interior de tuberías invisibles, preparados para activarse de forma instantánea ante un aumento localizado de temperatura. El diseño de estas redes de agua contempla además la existencia de cuartos de bombas especializados, donde el equipamiento –bombas jockey que mantienen la presión de servicio, bombas de elevación y unidades de respaldo– asegura una respuesta ininterrumpida, aun ante variaciones en la presión de la red pública o cortes de suministro prolongados. Cuando se trata de garantizar reservas de agua suficientes para alimentar los sistemas contra incendios en situaciones de alta demanda, la construcción de cisternas y cuartos de bombas contra incendios adquiere una relevancia decisiva

 
Leer más...

from delpozofoto

En la era de las redes sociales, la fotografía inmobiliaria en Madrid adquiere un valor adicional al integrarse en campañas de marketing digital que incluyen anuncios en Facebook, Instagram y LinkedIn. Cada red social exige formatos específicos y narrativas visuales distintas, por lo que el profesional de Fotografía inmobiliaria en Madrid diseña versiones adaptadas —imágenes cuadradas para el feed, verticales para stories, banners horizontales para anuncios patrocinados—, manteniendo siempre una línea estética coherente que refuerce la identidad de la inmobiliaria. Así, el fotógrafo inmobiliario Madrid se convierte en un aliado estratégico que no solo captura propiedades, sino que también aporta su criterio para seleccionar paletas de color y estilos de edición coherentes con la marca, generando reconocimiento y afinidad en el público objetivo. Conoce en este lugar el fotografo inmobiliario Madrid mejor valorado por los clientes en la actualidad. En el competitivo mercado de la vivienda, la fotografía inmobiliaria en Madrid se ha convertido en una herramienta fundamental para destacar cada propiedad frente a cientos de alternativas publicadas a diario en portales especializados. Los profesionales que se dedican a Fotografía inmobiliaria en Madrid conocen la importancia de captar tanto la luminosidad natural como la amplitud de los espacios, empleando objetivos de gran angular y técnicas de bracketing o HDR para equilibrar interiores oscuros con vistas al exterior. Cada proyecto de fotografía para inmobiliarias comienza con un estudio previo de la mejor hora del día para disparar, analizando la orientación del inmueble y la incidencia del sol, de modo que los planos resulten atractivos y transmitan una sensación de calidez y confort que invite al posible comprador a programar una visita. Cuando una agencia decide potenciar su catálogo online, contrata a un Fotografo inmobiliario en Madrid que, además de dominar el lenguaje técnico de la cámara, aporta una visión artística capaz de resaltar los puntos fuertes de cada vivienda: desde el reflejo de la luz en suelos pulidos hasta la perspectiva de un salón diáfano que da acceso a una terraza con vistas al skyline madrileño. Estos profesionales suelen llegar antes de que amanezca para preparar encuadres limpios y libres de elementos personales, ordenando mobiliario cuando es necesario y ajustando la complejidad de la composición fotográfica para que cada imagen transmita elegancia y funcionalidad. El fotógrafo inmobiliario Madrid se encarga de entregar álbumes digitales optimizados para web y materiales en alta resolución para impresiones de folletos, garantizando que cada pieza de marketing refleje la realidad de la vivienda sin deformaciones ni colores irreales. La demanda de servicios de fotografía para inmobiliarias ha impulsado la especialización de los Fotografo inmobiliario en Madrid en nichos concretos, como la venta de pisos de lujo, la comercialización de promociones de obra nueva o el alquiler vacacional de apartamentos de temporada. Cada uno de estos segmentos requiere enfocarse en detalles particulares —texturas de mármol, vistas panorámicas de la ciudad, ambientes minimalistas o decoraciones boutique— y ajustar las sesiones fotográficas para reflejar el estilo de vida que propone la propiedad. Con ello, la fotografía inmobiliaria en Madrid deja de ser un mero documento gráfico para convertirse en un instrumento de venta emocional, capaz de mostrar al cliente potencial no solo un espacio físico, sino un proyecto de vida y una experiencia que solo un fotógrafo inmobiliario Madrid experto puede capturar con fidelidad y elegancia. El trabajo de fotografía para inmobiliarias va más allá de la simple toma de imágenes estáticas y se extiende al uso de recursos multimedia como tours virtuales en 360 grados y vídeos walkthrough que simulan un paseo por la propiedad. Estas producciones requieren la coordinación de un Fotografo inmobiliario en Madrid con especialistas en edición de vídeo y en montaje de audio ambiental, de manera que el usuario online obtenga una experiencia inmersiva y pueda explorar cada rincón del inmueble desde su dispositivo móvil o desde un ordenador. La versatilidad de estos formatos, combinada con fotografías cuidadosamente retocadas para corregir la perspectiva y el balance de blancos, se traduce en un mayor número de contactos y en un tiempo de presentación más reducido, puesto que el comprador dispone de la más completa información visual necesaria para tomar decisiones rápidas.

 
Leer más...

from cochesmenorca

En este comparador alquiler de coches en Menorca puedes alquilar tu vehículo con un ahorro importante de dinero. Es conveniente saber que la mejor forma de moverse por Menorca es siempre el coche. Como es evidente no es una opción sencilla ni cómoda llevarse uno su propio coche, salvo que vayas a vivir allí. Si vas de turismo la opción perfecta siempre será optar por un buen servicio de alquiler de coches en Menorca. De entre todas las agencias de alquiler de coches en Menorca es conveniente centrarse en aquellas que han demostrado una buena experiencia en el sector del alquiler coches Menorca. Entra aquí para conocer cual es el servicio de alquiler de coches en el aeropuerto de Menorca más popular y mejor valorado. Más aún: incluso te ofrecen la posibilidad del alquiler de coches de 7 plazas en Menorca, si sois una familia grande o un grupo de amigos. ¿Necesitas un buen servicio de Alquiler de coche de 7 plazas en Menorca? Incluso si lo que quieres es un Alquiler de coche de 9 plazas en Menorca, en esta página web podrás acceder a la mejor variedad en coches de alquiler en Menorca. Si estás a la búsqueda de un buen servicio de alquiler de coches en Menorca sin fianza o alquiler de coches en Menorca sin franquicia entra en esta página web ahora e infórmate acerca de Coches Menorca. Ellos te van a dar un excelente servicio de alquiler de coches en Menorca sin tarjeta de crédito. Muévete por la isla de forma cómoda y a tu ritmo, sin preocuparte de horarios. Reserva ahora (en este Website) tu coche de alquiler si tienes pensado viajar a la isla menorquina. Descubre cómo llegar a la Cala Galdana Menorca o a Monte Toro, dos lugares que no puedes perderte. En Coches Menorca te dan las mejores opciones de alquiler de coches en Menorca sin deposito, con entrega en aeropuerto y alrededores. Esta es la mejor forma de ahorrarse traslados, colas o esperas. ¡Lo importante es sacar el máximo partido a nuestro viaje sin perder ni un solo segundo!. Si estás buscando alquiler de coches aeropuerto de Mahon, entra aquí. Si estás buscando Alquilar coche en menorca entra en esta página web: Alquiler coche Menorca Aeropuerto. En esta web vas a poder encontrar el mejor coche alquiler Menorca según tus necesidades. Alquiler coche Aeropuerto Mahon es lo que vas a poder dar con en este lugar, además de otros servicio relacionados con coche de alquiler en Menorca. Por ejemplo: Alquiler coche sin franquicia ni depósito en Menorca, Alquiler coches Menorca o Alquiler de coches en aeropuerto de mahon. Si estás buscando Coches de alquiler en Menorca o Alquiler de coches en aeropuerto de Mahon, entra aquí antes de nada: Cochesmenorca.es – Alquiler coches Menorca. Si te apetece pasar Vacaciones con niños en Menorca y contratar el alquiler de coches baratos en Menorca, entra en nuestro blog. Haz click en el siguiente link: cochesmenorca.es

 
Leer más...

from MakeArmy

Afternoon Laser Everything Crew!!!

From what I can find: Gantry lasers make the big bucks, while fiber lasers make the fast bucks. If you get an 80ish-watt gantry and a 20-50-watt fiber, you should be able to do most jobs.

Assumptions: – Assuming I need residual capital, but bootstrapped and prefer to try and use as little of it as possible. – This is also a side hustle to make extra money to hopefully become a business. I have been planning a way to start for a while now.

The Limits: My uncle has offered me a 10k no-interest family loan, no monthly obligation either. After expenses, I send the profit to him.

I can either get: – 60w MOPA with residual working capital (4k Leftover) – 55w Polar+ & 20w MOPA with (4k Leftover) – 60w Maker 20” x 28” & 20w MOPA

I have limited space. The first two options let me start this from my office space. The third, I would have to rework the limited space in my dungeon of a basement. My preference would be to go 60w MOPA. I wish to focus on metals and quick items. I have a kid, a job, and other usual domestic items, so I need to squeeze in the work. I have a lot of connections for what would be small items to be produced in my area.

I have experience using and producing simple items on a Monport Hobby K40 with LightBurn.

Sincerely, Undecided in New Jersey

Hey Undecided!

I like the organization and thought you've gone through—and I mostly agree with your findings. Each wavelength has something they do exceedingly well (more so than other wavelengths). Fiber does your metal marking and engraving, CO2 gantry does your organics, wood cutting and engraving, etc. UV is honestly where the bar is set for glass these days, it's just not even a competition with CO2 anymore. Diode is similar to CO2 for functionality, but it's got a smaller dot size and is really ideal for marking rather than cutting—and has some other functional curveballs that give it overlap with other wavelengths for specific projects.

I don't like “poo-pooing” specific lasers when someone has an idea of what fits for their needs, but I just want to share some opinions that make some options not awesome for my preferences, and might affect how you enjoy (or don't) your unit after you get it. The absolute last thing I want is for you to get a machine and find it infuriating to operate. I figure at least if I give you our train of thought behind how we would go about it, it gives you some points to balance against your needs and help decide which is better for you.

The loan situation sounds like you have an awesome opportunity, and there's a lot of options thankfully that get you near or in the ballpark of two different machines, which means more material/project potential so you don't have to turn away certain jobs.

The OMTech Polar

It's a nice-looking little machine, and it's compact. The issue I have with it is that it's super limiting on Z-axis travel, so height-wise, you're going to be limited. There is a pass through at the base from what I recall, but I think it's only a small portion that's meant for resting their included rotary down there so there's enough room to fit a cup. Real big cups are going to be a no-go because of the Z depth unless you figure out some kind of drop table system where you can have no table under the cutout in order to control the height at will more easily. As long as it does what you need, that's what's important. It just drives me nuts personally because now if I want to do a large object or cup, my laser is no longer self-contained, I could burn the table it's sitting on if the job freezes, airflow and fume control, etc. It's not a huge deal if you know that's gonna fit your needs and can work around the concerns, but if it doesn't, then at least you know it's not for you before dropping the 3–4k.

The method their head uses to move the entire assembly of the head for focus is absolutely infuriating too. If you want to rerun a job for batches of items, you have to redo the focus process—it doesn't just stay at a height, it pulls the head up as part of the re-homing process at the end of each job or when a job is stopped. For some people, this is a super frustrating thing that can mess up workflow pretty bad, especially if you're doing batch work or want to stop and restart a job. If you forget to refocus, you may nuke a project by accident.

They, at the very least to their credit, do cover the material thickness and tray-less functional area in their spec portion of the product page. Some brands literally go out of their way to omit that info so the machine capabilities get glazed over, good on them for being upfront I guess. They have the listed max material thickness at 0.7 inch to 2 inch without bed, so basically if whatever you want to engrave doesn't fit in that bottom panel that drops out, you're gonna be stuck. Basically only gonna be able to do small cups, thin material cut-outs, coasters or hot plates. This may be fine for your projects, or it may be too limiting.

The other thing is on the original Polar they only had a push button and NO controller screen. On the Polar+ I think they have a touchscreen controller? I'm not super well-versed on it to be honest, but the original absolutely drove me bonkers. You had no method of identifying why something wouldn't run or the error that was being thrown—just a red blinking light when the job wouldn't start—and there was no pattern or anything to identify why. My understanding is this is no longer an issue, but I would just verify before you buy. After experiencing just trying to help people with that on the initial launch, I personally wouldn't spend money on something that has a DSP controller but you get none of the features because they opted to just not install a screen. Would drive me absolutely nuts to use it.

My Suggestion

I would 1000% go with the OMTech Maker 60W. 60W is a solid starter, 80 or 100 of the same model if you really need the cutting power—either way it's a good base and may just need a little love to be perfect.

Reason being: – You get the traditional auto focus where the bed moves and the head isn't variable. – Your material height when doing batches would be constant. – The head isn't retracting on job stop or completion.

It just makes for a better workflow for most people, and there's less hoops to jump through or remember prior to each time you hit start, and also less to break on a head with no moving parts. For Z depth, it's like WAY more capable. You can use pretty much any rotary and do just about any cup or round item as long as the rotary will hold it. The 60w a bigger machine, but it's only about 10 inches bigger in width and length. Height—I'm not sure if it matters for you—but I see that as a benefit anyway, and you get a stand so you can move it or level it if required. No tube extension like on the 100W version, so it's actually not awkwardly in the way either.

Also, pass-through—forgot to mention. You can do long sheets through the pass-through areas if you needed to. Makes long cut-outs of large single objects possible. Not a thing for everyone, but if it's in your wheelhouse, then it gets you in the door.

You will need to buy a separate chiller (make sure it's a real chiller and not just a pump + radiator), but honestly if you can swing the 400–500 bucks for it, it's just a way more capable machine and you'll get way more time and use out of it, way less limiting, and you'll be able to accept more jobs if you're doing job-shop work. This model base is also just a really good value. You get auto focus and a reasonable size, depth, speed, and it comes in at about 50% or more off the more premium options that come in a similar size. There are cheaper options at this size on eBay, but you REALLY sacrifice a lot of value and quality, so I think it's kinda the sweet spot for performance per dollar at the moment if you're okay with some tuning and polishing.

Job Shop vs Product Seller

Local business options is an awesome expansion route if you have feet in doors, so to speak. If job-shop is the goal, then versatility and flexibility is the idea—giving you max range in variety for doing as many materials as possible. If so, then a 30–60W fiber and the 60W 20x28 CO2 is probably how I would start as well. If you know you have a market or jobs lined up specifically require one over the other, then even if you start with one machine that fits all the needs and expand after the first few jobs, that's not a bad way to go either.

If you want the product route (if that fits your prospects in your area and could maybe do online sales too), I would plan out products/materials (not necessarily designs, but what exactly the materials you want to work with and sizes, etc.), and you can plan out what machines have more upfront value. You can still do job-shop stuff too on the side for extra income as you discover which products sell well – just another way to approach it and worth discussing to add into your expansion and build-out plans.

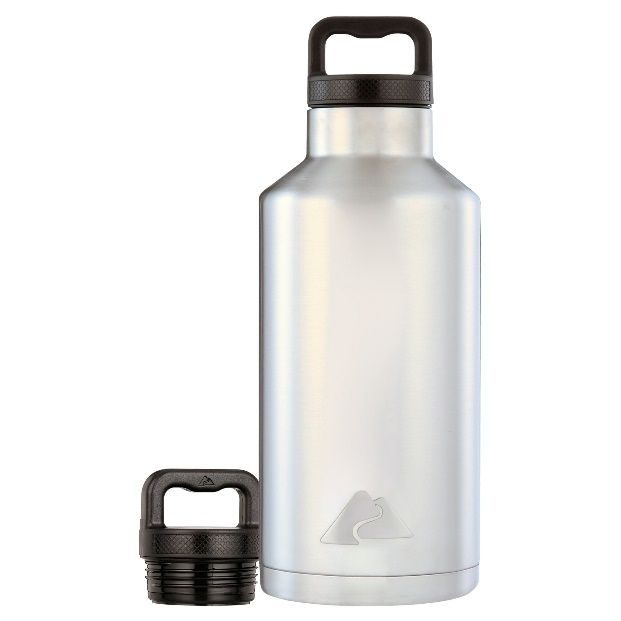
CO2 Galvo Considerations

As a little add-on consideration: if you don't plan on needing to cut literally anything—if you are doing cutting boards, powder-coated tumblers, Yeti, Stanley, whatever – another option for organics instead of a CO2 gantry is a CO2 galvo (parted out properly). It's faster, but it's NOT the right choice if you plan to cut. If you plan on making custom box cutouts or doing ornaments cutouts, or dinosaur bone assembly puzzles or whatever, get a gantry. Don't try to mix cutting materials with galvo starting out, it is a headache and not a great quality option in most cases. But if you needed to do like 100 tumblers on your day off from your normal 9–5 job, the CO2 galvo can make that happen in an afternoon—and a gantry is gonna be like 30–50% slower probably. It's been a while since I've looked at pricing, but it's a consideration option.

Fiber

For fiber, 20W can work, but if you need anything larger than 110mm on lens size to fit a project, there's a solid chance you may have some troubles. If you expand to a 200 lens, it really shows the lack of wattage quickly. If you can, I'd try and swing a 30W just in case. If you ever needed to use a 200 lens, or a 300 for coating removal, it would be much more in the ballpark for you and you won't feel quite as limited down the road.

For the cost difference between a 30W and 50 or 60W though, it might be worth considering the 60W, but it all depends on what you need and want to cover. If there is zero chance of needing to do copper marking or deep engraving, 30W may be plenty. Price differences for a non-MOPA are pretty appealing, but a MOPA 30W to 60W is really only like $800 difference or so I think, depending on what and where you get and the bundle of options included.

I absolutely love my 60W fiber. I could have gotten away with less power for most jobs, but with the extra power I can move through some jobs a little faster. Quick marking jobs are NOT where the extra wattage helps. It's the deep engraving stuff where it hits its stride—but you have to tune for jobs like that or it's just moving at the same pace. Some projects can function as a loss-leader for your time to get people in the door and your name out there though. Coins and stuff like that can be profitable if you're min-maxing your output and keeping your run time in consideration when doing design work.

Outside of that, 30 or 50W for basic marking is totally fine—it all depends on your planned or potential projects. The MOPA aspect of it with the M7 sources comes in with a little more reliability, gives you more tunable power delivery for really light plastic marking or really hardcore deep engraving and material removal.

A Note on Safety

No matter where you set up shop, your main priority should be your exhaust and air replacement.

It’s going to be expensive if you need a fume extractor, so cost-wise it would be best to plan for a 6” or 8” exhaust fan at your exit point with ducting to the machines so it sucks out (instead of blowing from far away) to outside where it’s not going to be pumped right into someone’s face or another window. Make sure you have an air inlet to replace the air you’re trying to suck out with the exhaust, even if you crack a window elsewhere. Air will find its way back in through suction, and you ideally want to make sure it’s clean air from nowhere near your exhaust. I get replacement air on the wall at the opposite side of my shop that I blow my exhaust out. A good air seal for the exhaust point is important too so the contaminated air doesn’t blow right back in the window it’s being pushed out—path of least resistance.

We've chatted on the channel about exhaust setups on the podcast, and I’ll be covering that as part of my ground-up shop build-out at my house where I’m moving (videos coming, just life chaos), so hopefully that helps with more detail on that.

DO NOT put that off. Don’t run the lasers unless you have it set up. It’s not worth your or your family’s health and well-being to push that.

For space-savings, the all-in-one style fibers are nice, but they are a little harder to work on if you need to repair them, and sometimes they use slightly custom parts depending on what you get. For that reason, I kind of have a bias toward standard split style fiber lasers (box with controller and electronics separated from the laser base/head/tower). It also makes it easier if you ever needed or wanted a taller tower for large objects—it's easier to replace and swap out.

I'll include a few affiliate links (they support our team and help cover the time we spend helping out by awarding us a small comission.) If you don’t want to use them or have something else in mind, it’s all good – they're just there if you like the suggestions and want to support us. Won’t cost you anything extra.

I was trying to find a 50W JPT LP-sourced fiber as a slightly lower-cost option, but honestly there don’t seem to be any on Amazon that are worth linking – they are too close in price or more than the 60W options from reputable brands.

There are 50W Raycus options from Cloudray for a reasonable price, but I’m holding off on recommending that (Raycus issues, not Cloudray issues). Too long to explain without making this a longer novel, but you’ll see a video come out about it later.

It’s not worth the ~$2k in savings if your laser is going to be down for 2–3 months after you buy it, and have it sit in pieces after you fully disassemble it during that time for Raycus to have a 50% chance of fixing it on the first try.

In terms of purchasing both the 20x28 OMTech CO2 and any of the fibers, they all pretty much take up the same space regardless of how you mix nad match them. Minor difference for the AIO option if you are super strapped on space. Wattage on the fiber isn’t going to change much, or at all really on space, just weight.

I think no matter what options you pick in and around that range, you should be able to stay under that $10K mark and have some wiggle room to cover state taxes, extras, etc. you run into as you set up and find things you need—exhaust and all that.

Honestly, a really solid build-out and capability list.

If you’re looking for some other options, just let me know and I’ll be happy to help if I can.

Hope that helps!

Kind regards, Kyle + The LE Team

 
Read more...

from MakeArmy

Starting or growing a laser engraving business requires a careful balance of investment and profitability. Understanding how much revenue you can generate from your laser engraver before making a purchase is crucial for long-term success. That’s where LensDigital’s Free Laser Profit Calculator comes in.

LensDigital ROI Calculator

What is the LensDigital ROI Calculator?

LensDigital, a company well known for its laser accessories and tools, has created a free, easy-to-use ROI (Return on Investment) calculator to help laser business owners estimate their potential profits, revenue, and payback period before purchasing a laser engraver. You can check it out here: LensDigital ROI Calculator.

How Can This Help Your Laser Business?

Many small business owners invest in laser engraving equipment with only a rough idea of how profitable it will be. This calculator helps remove the guesswork by allowing you to input key factors such as:

  • Laser engraver cost
  • Material cost per project
  • Price per engraved item
  • Production time and output per day
  • Labor costs

Based on this data, the tool estimates your potential monthly and annual profit, helping you make an informed decision before committing to a purchase.

Why Use This Calculator?

  • Estimate Your Break-Even Point – Find out how long it will take to recover your investment.
  • Optimize Pricing – Ensure your prices cover costs while maximizing profits.
  • Understand Scalability – See how increasing production affects revenue.
  • Plan Future Investments – If you already own a laser engraver, use it to evaluate whether an upgrade makes financial sense.

Final Thoughts

The LensDigital ROI Calculator is a valuable tool for both new and experienced laser engravers. Whether you’re considering buying your first machine or expanding your business, this tool provides clear financial insights that can guide your decisions.

Give it a try and see how your laser engraving business stacks up! Check out the calculator here.

 
Read more...

from MakeArmy

On February 20, 2025, Creality released the Falcon2 Pro 60W laser engraver, introducing several advanced features aimed at both hobbyists and professionals. This new model is designed to enhance precision, speed, and versatility in laser engraving and cutting.

the creality falcon2 pro

Key Features of the Creality Falcon2 Pro 60W:

Triple-Laser System with Adjustable Power:

The Falcon2 Pro combines twelve 5.5W laser beams into a single 60W output. It supports adjustable power settings of 22W, 40W, and 60W, allowing users to tailor the laser's intensity to different project needs. It is capable of cutting through materials like 22mm basswood, 30mm black acrylic, and 0.2mm stainless steel in a single pass.

Built-in Auto-Positioning Camera:

A centrally located camera provides real-time previews and precise positioning of designs, aimed at improving accuracy during engraving and cutting.

High-Speed Performance:

The Falcon2 Pro is designed to achieve cutting speeds of up to 700 mm/s, intended to increase productivity for users working on large-scale projects.

Safety Features:

The machine includes airflow monitoring, flame detection, lens contamination alerts, and an emergency stop button. It also features a fully enclosed design with a transparent, light-filtering cover for enhanced safety during operation.

Versatility with Additional Laser Module:

The Falcon2 Pro comes with an additional 1.6W laser module, suitable for detailed engraving on materials like wood, leather, acrylic, and certain metals.

The Creality Falcon2 Pro 60W is now available for purchase. More details, including technical specifications and purchasing options, can be found on the [official Creality product page].

 
Read more...

from MakeArmy

LightBurn has released the 2.0.00 Release Candidate, introducing new features like additional Shape Creation options, an Edit Nodes submenu, improved Camera Calibration, and Dark Mode. This version is open for public testing to gather user feedback before the official release. Users are encouraged to report any bugs to help refine the software. You can download the release and find more details on their [official page].

 
Read more...

from MakeArmy

In a recent announcement on the LightBurn Software forum, it was revealed that support for Linux operating systems will cease after version 1.7. This decision has sparked a flurry of reactions from the LightBurn user community, highlighting the impact on Linux-based users and their responses to the change.

Overview of the Announcement

The forum post, made by the LightBurn development team, informed users that due to increasing complexities and challenges associated with maintaining compatibility with Linux, LightBurn's developers have decided to end official support for Linux platforms after version 1.7. The decision is driven by the desire to focus resources on platforms with larger user bases, which are Windows and macOS. The post emphasized that while the software will still be available for Linux users, there will be no further updates or official support for issues encountered on Linux systems after this version.

Community Reactions

The announcement elicited a range of responses from forum members, reflecting the diverse user base of LightBurn who rely on Linux for their laser cutting and engraving needs.

Disappointment and Frustration

Many users expressed their disappointment and frustration at the discontinuation of Linux support. One user, “LaserTech99,” commented:

“This is really disheartening news. I’ve been using LightBurn on Linux for over a year, and it's been a great tool for my business. Ending support will force me to either switch operating systems or find a less reliable alternative.”

Another user, “OpenSourceFan,” voiced similar sentiments:

“It feels like the Linux community is always being left behind. I understand the challenges, but it’s frustrating that we’re losing a tool that works well for us. What are the alternatives for those of us who prefer open-source environments?”

Calls for Community Solutions

In contrast, some forum members proposed potential solutions or workarounds. “LinuxLaserEnthusiast” suggested:

“While official support is ending, perhaps we can keep the community alive through forums and shared troubleshooting tips. I’m sure there are many experienced Linux users who can step up and help each other out.”

Similarly, “TechieTom” recommended:

“If the issue is maintaining compatibility, maybe we could create a community-driven fork of the software. It’s a long shot, but if there’s enough interest, it could be a viable path forward.”

Understanding and Support for Developers

A smaller segment of the community showed understanding for the developers' position. “PragmaticPat” noted:

“I get that maintaining support for multiple platforms can be a huge burden. It’s a tough decision, but I appreciate the transparency. I hope LightBurn continues to thrive on other platforms, and maybe future versions will address Linux support in some way.”

Suggestions for Future Improvements

Some users took the opportunity to suggest improvements for the remaining Linux support. “FeedbackFan” suggested:

“If you’re wrapping up Linux support, it would be great to have a final update that addresses key bugs and stability issues. That way, we can make the most of v1.7 before it’s discontinued.”

So what's next?

The decision to end Linux support for LightBurn after version 1.7 has clearly resonated deeply within the user community. While the move has been met with a mix of disappointment, calls for community action, and understanding, it underscores the ongoing challenges of software development across diverse platforms. As LightBurn shifts its focus to other operating systems, the Linux user base remains hopeful for potential future solutions or alternatives that might bridge the gap left by this change.

You can read more on the [forum post here].
 
Read more...